Create a Small Website of at least five pages plus a Home (Index) Page.
In this module you will create a small website of six pages, that is the Index (Home) Page and five linked pages. The linked page names can be changed to suit your website. This does not need to be done until the site is near completion.
This task is learning how to create your own website, using pre-formatted template pages.
Here are the steps involved:
1/. Create a website folder and a pics sub-folder within the main website folder.
First you will need to create a folder in your U-Drive, called my_website. In this folder everything you use for the website will be placed. You need to also create a sub-folder in the main folder called pics. This is where all your images will be stored. You cannot just copy/paste images into your webpage. They will not appear when the page is viewed in the browser.
2/. Download the templates:Here are the webpages templates that you will be using, editing and creating from.
You need to right click on each link separately and Save Link As:
3/. Research your topic/s:You could have one topic on your website with different link pages covering different parts of the topic, or you can have a themed website with a new topic on each page.
You could have one to five different topics, (or one topic with five different parts) with the Index (Home) Page linking it all together.
The, choice of topic/s is open and could be an interest, hobby, something you want to learn about, sport, music, actors, singers. But a main requirement is that it must be educational and non-violent.
In researching your topics you will need text based content and images.
Images must be saved to your pics folder. Copy/paste will not work, as the images must be embedded in the page by inserting the image/s from your pics folder.
In gathering images you will be able to edit them in Photoshop, that is make a larger image smaller (but never a small image larger, as that does not work, as they will pixelate and become blurry).
Images need to be (or cropped to): Headers 900px, within page images - up to 900px - but within the content section of the page you could have images two wide (that's 450px each), four wide (that's 225 pixels each), or any combination up to 900px wide.
4/. Layout of the pages:The Index (Home) Page is there to describe what your site is (to be) about, with images and some descriptive text. Just like a shop window, creative and encouraging you to enter.
Then each of the four link pages will have a mix of images and text. The text can be in dot points, or as one sentence is a paragraph, which will allow plenty of white space, which is good for websites, but definitely not an overload of copy/pasted content.
On each page there will be a header image, a links bar and some text and images.
In the templates provided there are five table rows and two columns. These can be changed, just ask.
You can also add more table rows by placing the cursor in the last cell and hitting the tab key.
5/. Colouring in the pages and page themes.You should think about colour schemes for your pages only after building them. Look at what you have and what better suits.
You could have the same colour scheme throughout, or shades of the same colour.
You could have a large image as the background (large = about 1500px wide). This is placed in using the Properties Window and Background Image commands.
If you use a background image for the whole page, then you need to have a table, or table row background, to be sure your text and other images work. There is no use having ant text that cannot be easily read. (See this page for example).
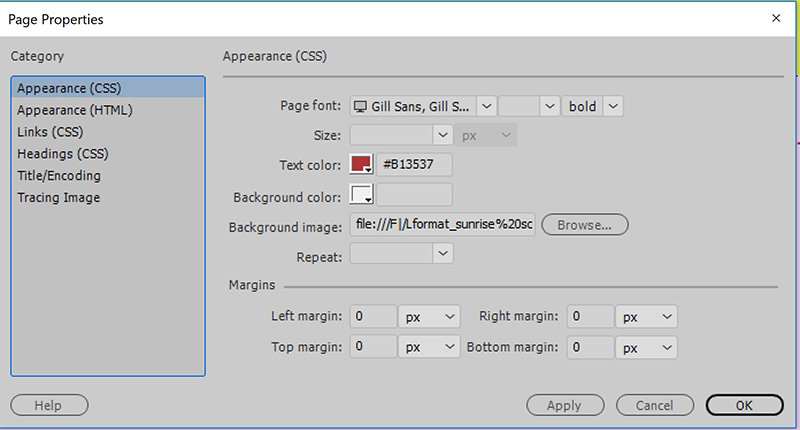
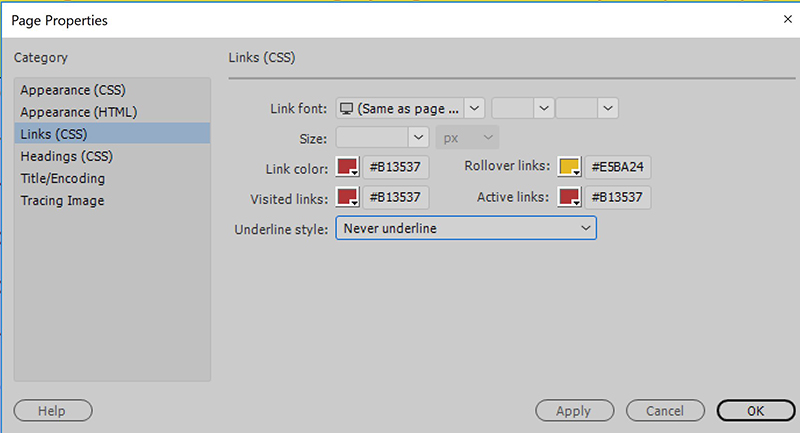
6/. Page Properties dialogue window.
This is found under Window/Properties and it is a floating menu (unfortunately, as it does get in the way and is poor software design).
The Properties window allows you to:
Change the font.
Create a background colour for the page (different to table row colour).
Insert a background image, as done in this page.
Set the four margins to zero (essential).
The window as opened in Dreamweaver.
The main dialogue window.
The links dialogue window.

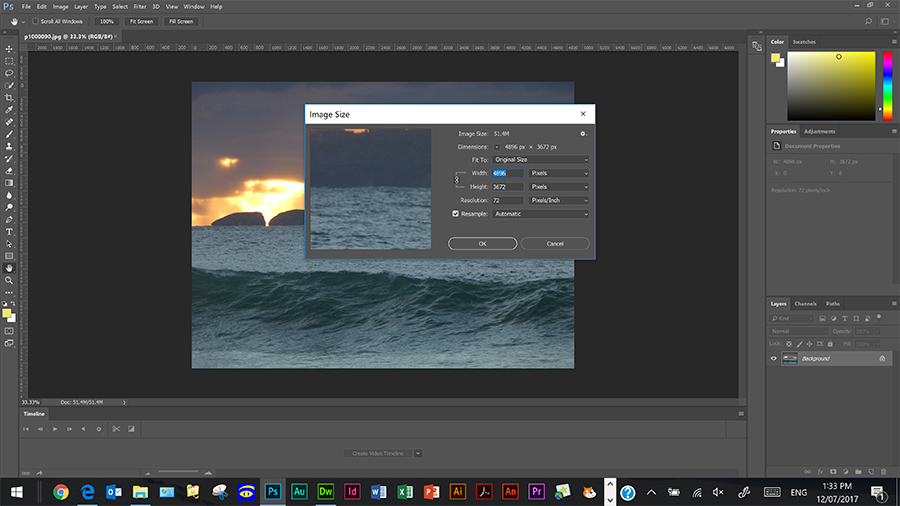
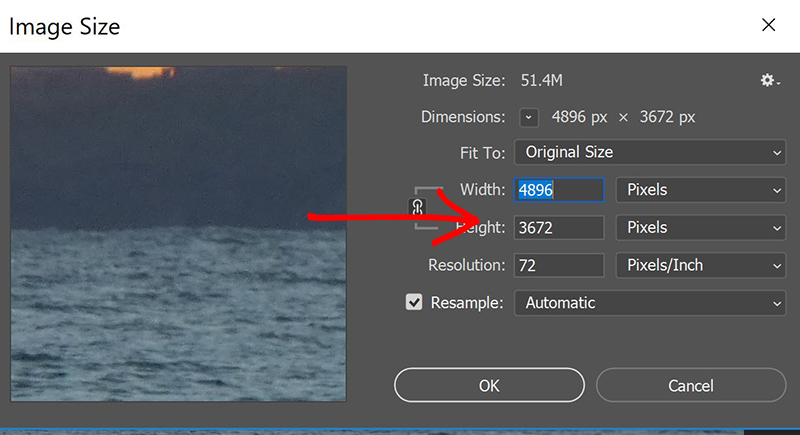
7/. Photoshop skills.You will need to use Photoshop to resize and crop images.
Image Resize:
Ensure the Width and Height are linked by the chain, otherwise the proportions will stretch.
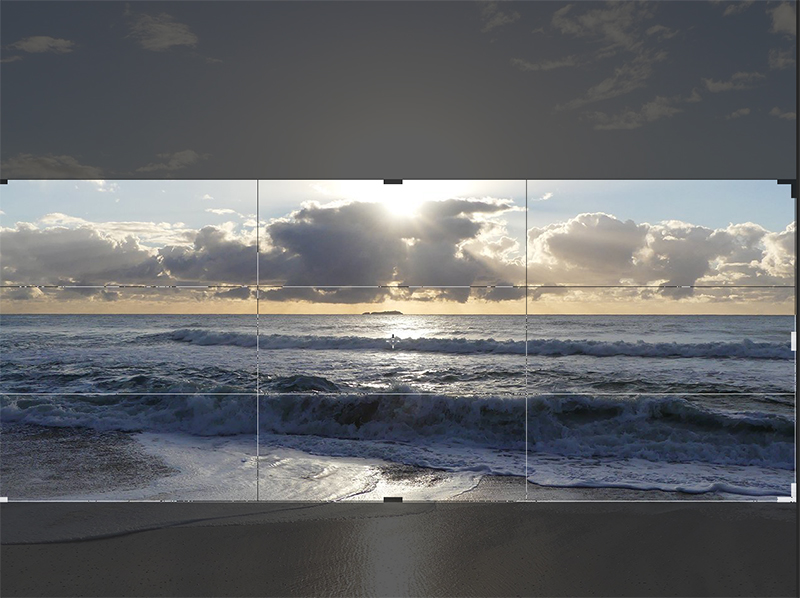
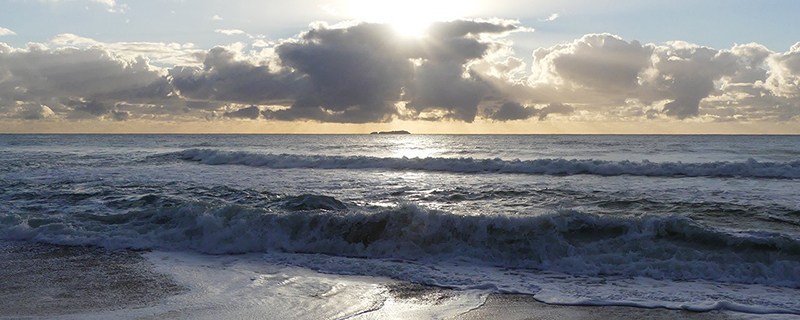
Image Crop:
This is where you want to remove a part of the image.
You can see the original image, with the crop markers. The cropped image is below.
There are many, many other functions of Photoshop. This is only a basic intro. In Years 9 - 12 a more detailed approach to Photoshop is currently offered in T.A.S.
| Main | Index Page | Link1 | Link2 | Link3 | Link4 | Link5 |