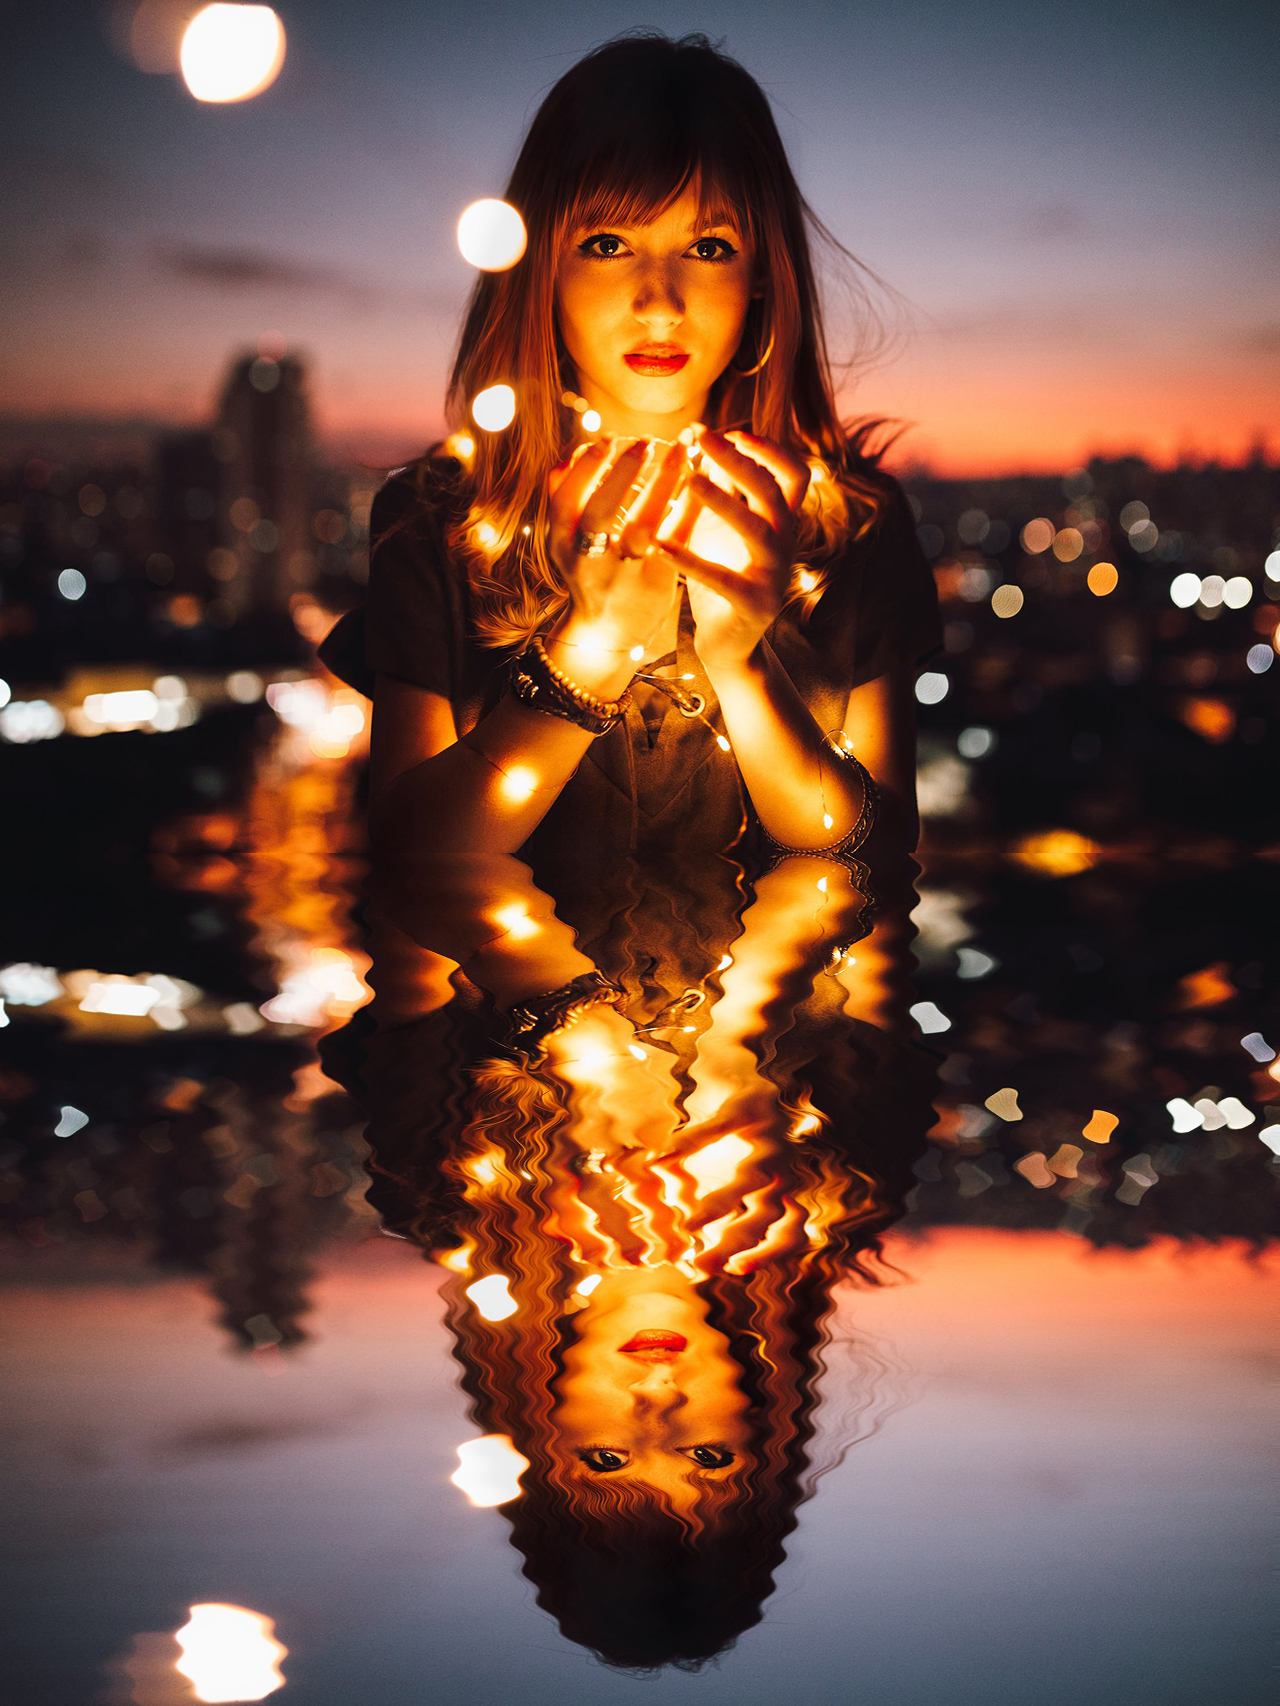
Create a realistic water reflection.
There are quite a few steps in this creation. But the final image is well worth creating!
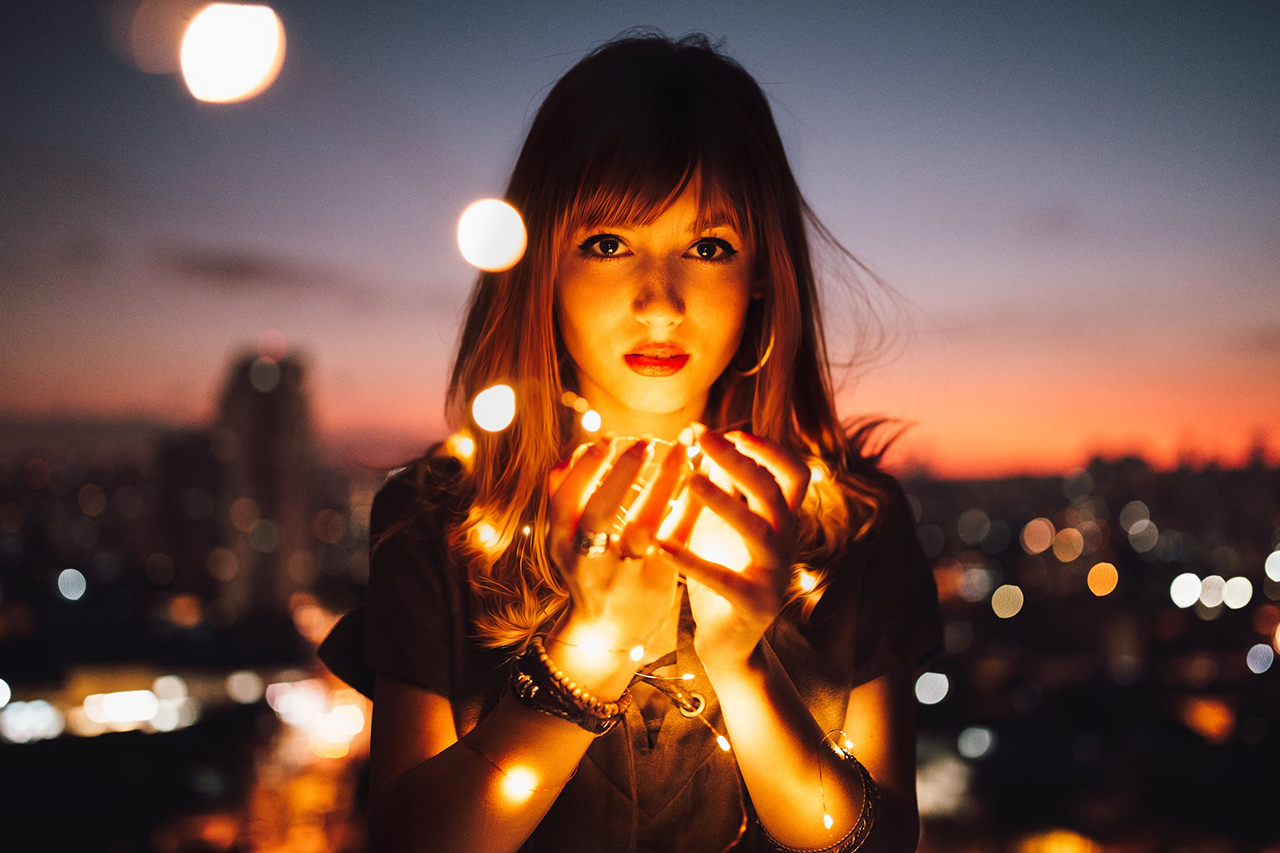
1/. Find a suitable image to work with. It must be suitable to be transformed. The image should be about 1280px wide and must be a horizontal. You can get a larger image and resize it. But do not get a smaller image.
This link will show you how to find the image size in Google Images.
This image was used for the example, but you can use your own if you want to. To use this fantastic image, click on it for the larger sized image to open.
2/. Once you have your image (of the right size), open the image in Photoshop. If the image is too large, Image/Resize width to 1280px, which will easily fit on your computer screen. Then check on the image size and take note of it.
3/. Create a new image File/New and make it the same width as the image you have opened BUT the height is to be doubled. That is an image 1280px wide x 960 px high needs in the new image to be 1280px (w) x 1920px (h).
4/. If the Layers window is not showing (bottom right), then in the top Menu Bar go to Windows/Layers and turn it on.
5/. Copy/Paste the original image onto the new image file and using the arrow tool, position the image at the top of the second image. (Layer1).
6/. Select Layer/Duplicate Layer, from the menu bar at the top.
8/. Then using the Edit menu option, select Edit/Transform/Rotate 180 degrees.
9/. Add a new Layer from the Layers Menu.
10/. Fill the new layer, with white paint, using the Paint Bucket.
11/. (If the Paint Bucket is not shown in the Toolbox, it: (1) It maybe under the Gradient Tool, if that is not shown in the Toolbox, click on the three dots tool
and find the Paint Bucket Tool

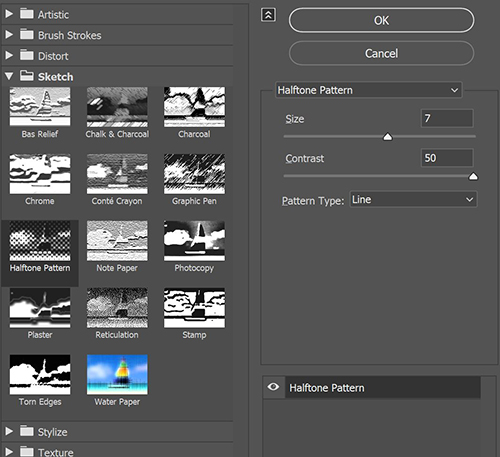
12/ . Using the Filter Menu (top) Filter/Filter Gallery, Half-tone Pattern. Then using the dialogue box right set the following: Size 7, Contrast 50, Pattern Type Line.
13/. Then in the Filters Menu, select Filter/Blur/Gaussian Blur and set the radius to 4.0 pixels.
14/. Select the lines layer (Layer 2) and then Layer/Duplicate.
15/. Now save the file as mirror.psd. This file will be used again later.
16/. In the Layers Window - delete the lines layer. But keep the lines copy layer, as this is the one you drag the images over (see below).
17/ . Drag the top image over the lines copy layer (top). Then drag the bottom image over the same layer you just used. What will then appear where the lines layer was is both images - top & bottom.
18/. Select the bottom layer. Then Filter/Distort/Displace, add the settings Horizontal 4, Vertical 0, Stretch to Fit and Repeat Edge.
However, the Horizontal setting may need increasing, depending on the image chosen. Experiment - to find the setting number - possibly as high as 20. This all depends on the original image.
19/. A window now pops up 'Choose Displacement Map' in this case your mirror.psd. file. It will open and then select your file mirror.psd.
20/. The bottom layer will then become rippled.
If you are using a high setting number, your image may show some white area. If this happens crop your image.
21/. Save your final image as a .JPG file.