Project Name: Waterfall Reflections.
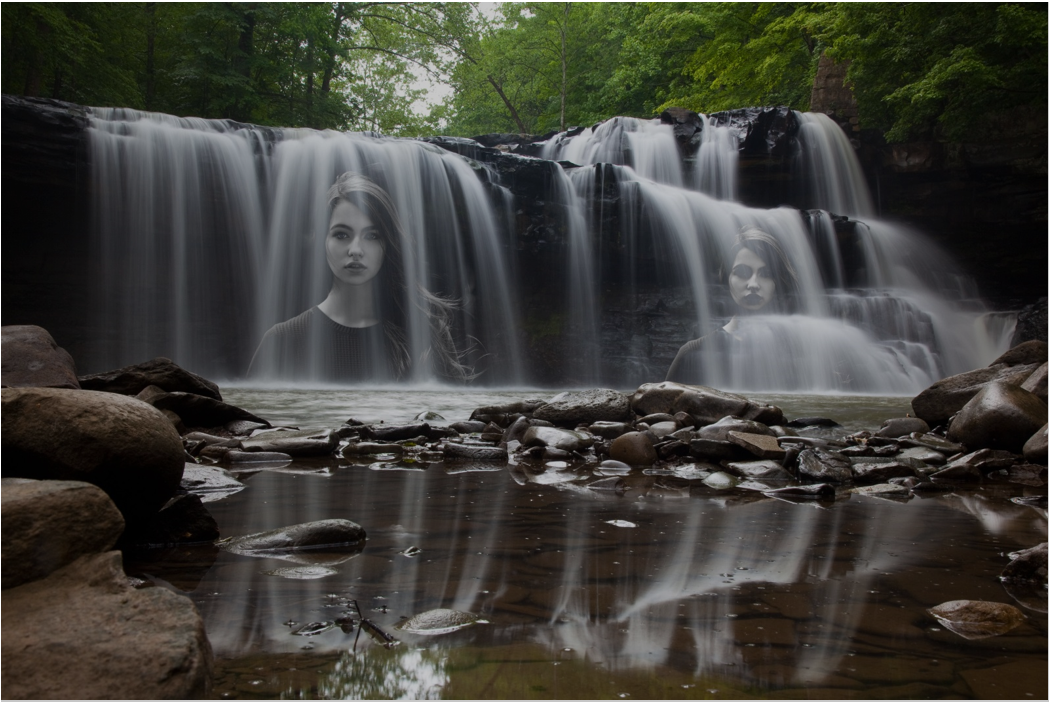
Final Image.
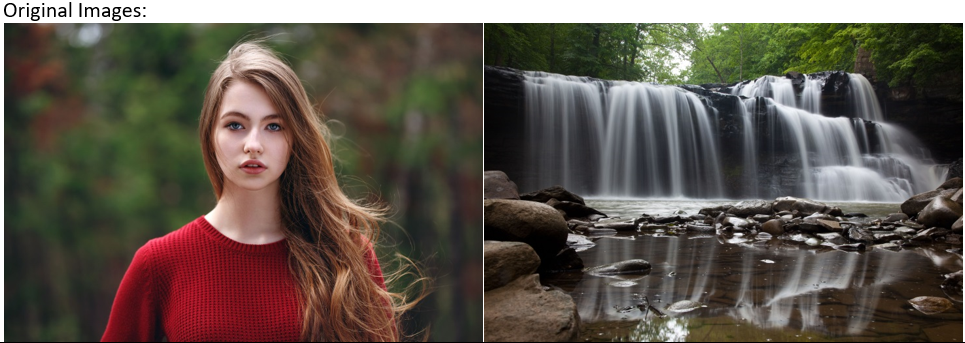
Original Images:
|
|
The Steps taken to Enhance the Image: |
- Open your image that you will use to reflect through the water; in this case it will be the lady.
- Now you have to remove the background which should be easy if you have a clean background. Click on the Quick Selection Tool (CTRL W) and click the background to select it. If you went over a bit of the woman just hold down the Alt key and draw over selected area back into the background.
- Then go to Select Inverse to make the woman selected.
- While you are still armed with the Quick Selection Tool (CTRL W), find the Select and mask button in the control panel above to reveal the Refine Edge options. Press the Smart Radius in the Edge Detection. By doing this, it will change the radius value so it reveals less rigid edges and minor details such as fine separate hairs.
- Click on the Refine Edge and Brush Tools on the left to refine tiny details such as hair. Set the Output To in the Output section of the options window to New Layer.

Select and Mask Edge Detection Refine Edge and Brush Tools
- Now open your background image, we will be using this waterfall image for this example. Make a new layer by clicking on the folded paper icon at the bottom of the Layers Panel.
- Now go back the woman image and press (Ctrl A - select all)>(Ctrl C - copy). Then go back to your waterfall image and make you have select your new layer and then press (Ctrl - V paste) this should put the cropped out image of the woman onto the layer so you can see her on top of your waterfall image. While you are still on the layer go up to the top of the screen and click on Image/adjustments/desaturation. This will make the image black and white.
- Now go to the layer panel and click on the normal drop bar and click on Lighten. It should make the woman image lighter.

bottom of layer panel
- Then click (Ctrl -T transform) to resize woman and move her onto the left waterfall. Lower the opacity of the woman to about 67% to fade her more into the water.
- Now to duplicate her to get a second image of the woman. To do this, while you are still on the layer of the woman, right click on the layer in the layer panel and a list of options should appear, click on Duplicate Layer.
- Another image of her should appear on top of the woman so just click and drag her and you should see the second woman. Now use (Ctrl - T) to resize her and move over to the waterfall on the right. Lower the opacity to 86%.

|
Ta Da!!! You have finished! If you have followed these steps correctly, you should get a really empowering if not spooky result.
The final Image:

|