How to Create an ani.gif (Animated Gif) in Photoshop, then make it into an .mp4 video
1/. Research your images - about 20 will do. But ensure all images are of the same size (both width and height).
This may not always be possible, so steps 2 and 3 will show you how to do this in Photoshop.
The image sizes should be around the 1280px (h) x 960px (w).
Only use landscape images. You could use portraits but then all must be portrait images. You cannot mix them up!
If all are the exact same size - skip the next two steps.
If there is any differences in the image sizes the ani.gif will jump!
2/. Open Photoshop and all the images.
Check the image sizes for all images and work out what is the best size to use for all of them.
3/. Resize the images.
This can be done two ways. If they are all the same but larger than 1280px wide:
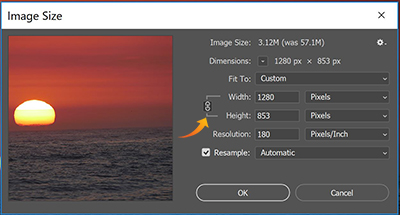
Image Size - change the image size to 1280px wide and the height must be the same for all at about 960px wide, as constrained proportions (see image below, with the chain link on):
If the heights vary, follow the step below to manually change the height.
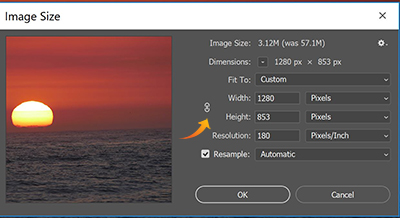
Image size: Unconstrain the sizing. See the image below with the chain not linked.
There you can change the image size manually for width and height.
Place all the images into a new folder - anigifs.
4/. With all your images resized, you are then ready to proceed with the animated gif (ani.gif).In Photoshop File/Scripts/Load Files into Stack.
Browse and select all the images and tick automatically try to align all images.
5/. Open the Timeline and in the centre of the timeline select Create Frame Animation.
Then click on Create Frame Animation.
The Timeline will show your first image.
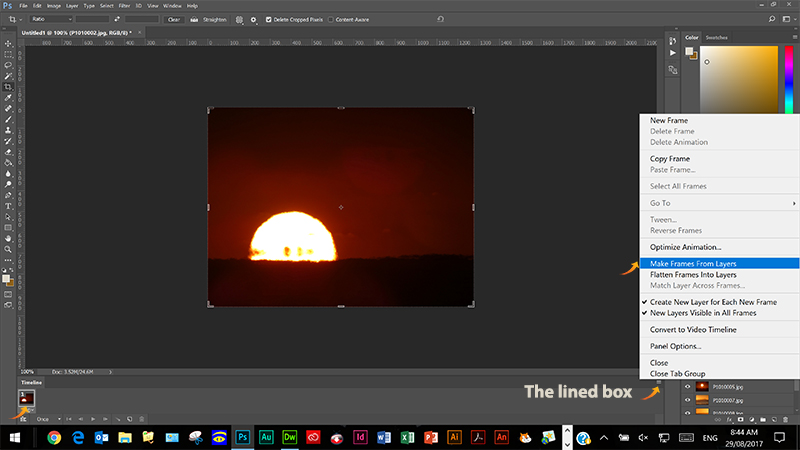
Then click on the Timeline lined box:
The menu will open up as below:
Select Make Frames from Layers.
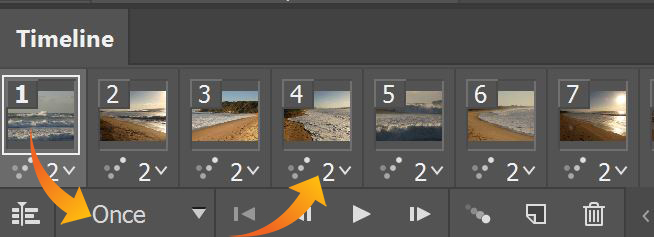
All your images will now appear in the timeline:
Now select/change once to forever or how many times you want it to run,
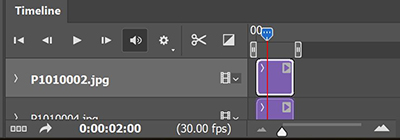
Now to change the animation transition speed to how many seconds you want it to pause. In this example it has been set to 2 seconds.
Click on the play icon and watch your animation run. If necessary change the speed of the animation transitions.

6/. File/Export/Save for Web Legacy.
Add a filename.
Save.
Done.
Run the anigif.
7/. Then make a .mp4 movie from your file:
Back to the timeline.
Use the icon bottom left:
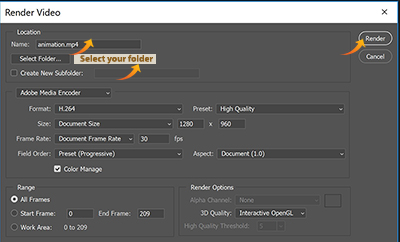
Then the following screen will appear:
Select the arrow.
Name your file.mp4
Select your U/Drive folder.
Then select Render:
Open your folder and double click on the file, which will play as a movie, which is slightly different to an ani.gif (animated gif).
Decide which you like the best - the .mp4 or the ani.gif. Hint in this case both are very similar.