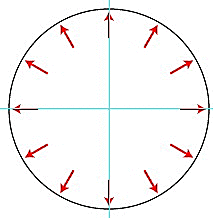
The Clock Face - to be drawn in Adobe Illustrator. Here is an example.
Though your clockface does not need to be as complex as the one below.
Do your internet research to find a clockface that you can work with. That is you need to drawn up in Adobe Illustrator.
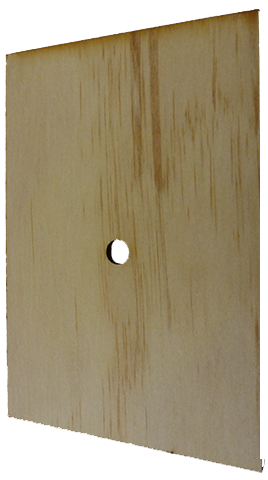
You do not need clock hands.
Your design could just be one with a design in each corner. That is one design drawn and copied to the other corners.
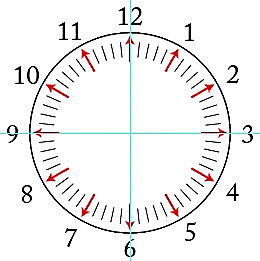
The numbers need only to be in five minute segments and no minutes.
 |
|
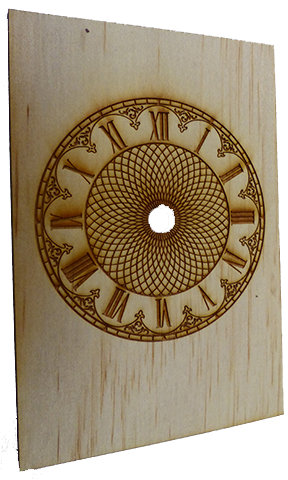 |
An example of a clockface design. Design your own clockface in Illustrator, using researched design ideas.
|
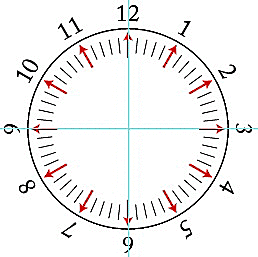
This tutorial explains all you need to know to make a clock face in Illustrator. The "Transform Again" command can save you a lot of work, and when you use it with the rotate tool, it can also save you from doing the math. See how easy it is to space objects around a circle combining these two tools.
|
Adding Guides
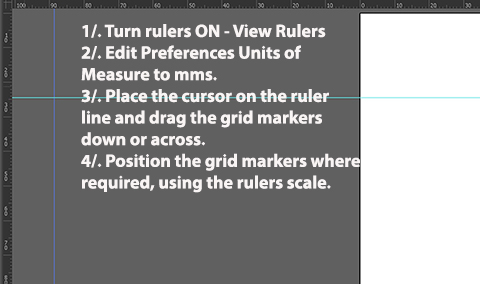
Use the ellipse tool to draw a circle for the clock dial. Hold the shift key as you draw to constrain the ellipse to a perfect circle. Mine is 4mm pixels X 200 pixels due to space limitations, but you may want yours larger. If you can't see the rulers on the document, go to View > Rulers to activate them. Drag guides from the top and bottom rulers across the center mark of the circle to mark the center.
We have to mark minutes first. The minute markings are usually different from the second markings, so I've used a longer and darker tick mark than I'll use for the second marks later. I've also added an arrowhead (Effect > Stylize > Add Arrowheads). Make one tick mark using the line tool on the vertical guideline at 12:00.
 |
 |
 |
 |
 |
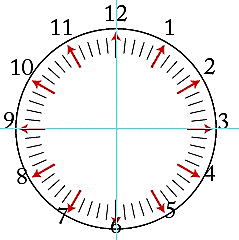
Making the Hour Markings
Your clock does NOT need to show the minutes, as shown in the above example.
With the tick mark selected – NOT the circle! – click the rotate tool in the tool box. Then alt click on the exact center of the circle. Now you can see why we had to use the Attributes palette earlier to open the rotate dialog. This will set the point of origin at the center of the circle.
We'll let Illustrator do the math to find the angle we need to rotate the hour markings. Type 360/12 in the Angle box in the Rotate dialog. This means 360¼ divided by 12 marks. It tells Illustrator to figure out the angle needed – which is 30¼ – to place 12 marks for the hours evenly spaced around the point of origin you set at the center of the circle.
Click Ctrl C so a copy of the original tick is made without moving the original. The dialog closes and you'll see two tick marks. We'll use the duplicate command to add the rest. Type Ctrl V 10 times to add the remaining 10 tick marks for a total of 12.
Adding the Numbers
Choose the horizontal type tool in the tool box and choose "Center Justification" in the control palette. You can use Paragraph Palette if you're using a version of Illustrator that's older than Illustrator CS2. Choose a font and color, then place the cursor above the 12:00 tick mark on the outside of the circle. Type 12.
Select the rotate tool again and alt-click on the center of the circle again to set the point of rotation. Type 360/12 in the angle box and click copy - Ctrl C, then OK. Now use Ctrl V 10 times to copy the number 12 around the circle. You should have twelve number 12s when you're done.
Use the type tool to change them to the correct numbers. They'll also be in the wrong positions – six will be upside down, for example – so each number must be rotated.
Rotating the Numbers
Select the number one. Choose the Rotate tool in the toolbox and opt/alt click on the center of the baseline of the numeral. There will be a small dot at the center of the baseline so you don't have to guess where it is. This puts the point of orientation at the base of the numeral. Starting with 30¼ for the numeral one because the hour tick marks were rotated at 360¼ divided by 12, type 30 in the angle box in the Rotate dialog. Then click OK to rotate the number by 30¼.
Select the next number – two – and choose the Rotate tool in the toolbox. Alt click on the center of the baseline of the numeral to set the point of orientation and keep the numbers rotated in proportion to the hour marks, adding 30¼ for each rotation. You rotated one by 30¼ so you'll rotate two by 60¼. Enter 60 in the angle box and click OK.
Continue adding 30¼ of rotation to each number around the clock face. Three would be 90¼, four would be 120¼, five would be 150¼, and so on, up to 11 for 330¼. Depending how far from the original circle you placed your first 12, some of the numbers will be too close or even on top of the clock face when you're done.
Repositioning the Numbers
Shift click to select only the numbers. Hold the opt/alt key and the shift key and drag outward on a bounding box corner to resize the numbers. Holding the shift key constrains the resizing to the same proportions, and holding the alt key allows the resizing to take place from the center. Now use the arrow keys to nudge them into position so you have something that looks like this. You can hide the guides at any time by going to View > Guides > Hide Guides if they get in your way.
Adding the Hands
Click the circle with the Selection tool to select it. Shift+alt+drag one of the corner handles on the bounding box to resize it in proportion from the center. This will make the clock face larger than the numbers. Add hands using the line tool with arrowheads: Effect > Stylize > Add Arrowheads. Place them on the vertical and center guidelines. If your clock is larger than this one and you want to add a rivet to hold the hands together, draw a circle and fill it with a radial gradient. Place the rivet at the center of the clock face.
Finishing the Clock
Give your clock face character with images, styles, strokes or fills. If you want to remove the arrowheads from the hour marks, open the Appearance palette (Window > Appearance) and click the "Clear Appearance" button at the bottom of the palette – it looks like the "no" sign, a circle with a slash across it. Because the clock face is totally vector, you can make it as large or as small as you wish. Just make sure to Select > All and then group it (Object > Group) so you don't miss any parts when you're resizing or moving the clock.