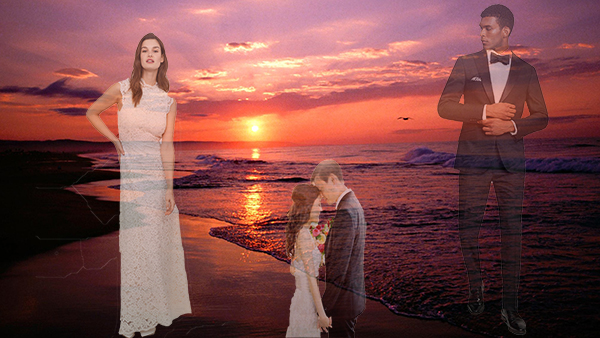
Couple on a beach - a romantic image.
Original Image/s:
The final image, after you have digitised the chosen images.

Here's how it's done.
1/. Find a suitable background image, such as a forest, or a beach at sunrise, or sunsets. Look for dynamic colours. This image should be at least 2mpx and 1600px wide.
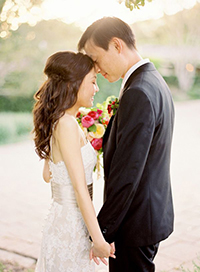
2/. Find a couple "in love", this could be a wedding photo. They must be facing each other for the scene to work.
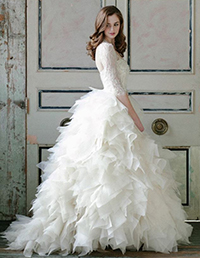
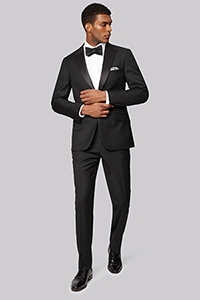
3/. Find a man and also a woman image that will work with your scene the background is to be removed from both.
These two images must be separate and they need to be looking at the camera or side on looking at each other, but not facing each other, as this needs to be a dynamic scene!
4/. Open all the images in Photoshop.
4.1/ First check all the image sizes for the right proportions. You may have to reduce the size of the man and woman images to fit the background.
4.2/ On the three images, check the image sizes and then File/New/Transparent, copy Paste individually the images to new transparent files.
You are going to have a smaller centre image and two imposing outer images.
4.3/ Using the skills you have learnt earlier remove the backgrounds on the two images.
(Either using the Magic Wand tool, the Quick Selection Tool, the Eraser Tool, the Rectangular Marquee Tool, or if you are very brave the Magnetic Lasso Tool).
4.4/ Save all three transparent images as .PNG files.
5/. Having the three images as .PNG files, it's time to bring them one, by one into the background as layers. The main background image is Layer1.Layer 2 is going to be the "couple" image. Copy it onto the Background image. If it is too large and that's a reality.
Use the Edit/Free Transform command and using the corner toggle resize the image. An alternative is to the Transform option is the delete the layer, open the image by itself and resize using the Image Size Resize command.
Then copy/paste the image back onto the background image as Layer2.
Do the same for the other two images. With these (If you need) you can flip either/both horizontally to obtain a better effect. But you do this before copy/paste into the background as a new layer.
6/. You will also need to reduce the opacity on the three "people" images, to obtain the right sort of effect on the layer you want to first reduce the opacity and in the Layers Window, reduce the opacity by say 50% and see the effect. You may need to go higher or lower depending on the image intensity.
7/. Repeat the steps for the other two images, ensuring you first select each layer as you work on them.
8/. Finally, check the now almost complete image, in it's PSD (Photoshop editable format). If you are happy with the result, save as a .JPG (final image) file and you are done!
Back to the Photoshop Main Page