A Photo within a Photo- Too Easy and Fun!
Here's an example of what you could do.
Click on the image for the larger version.
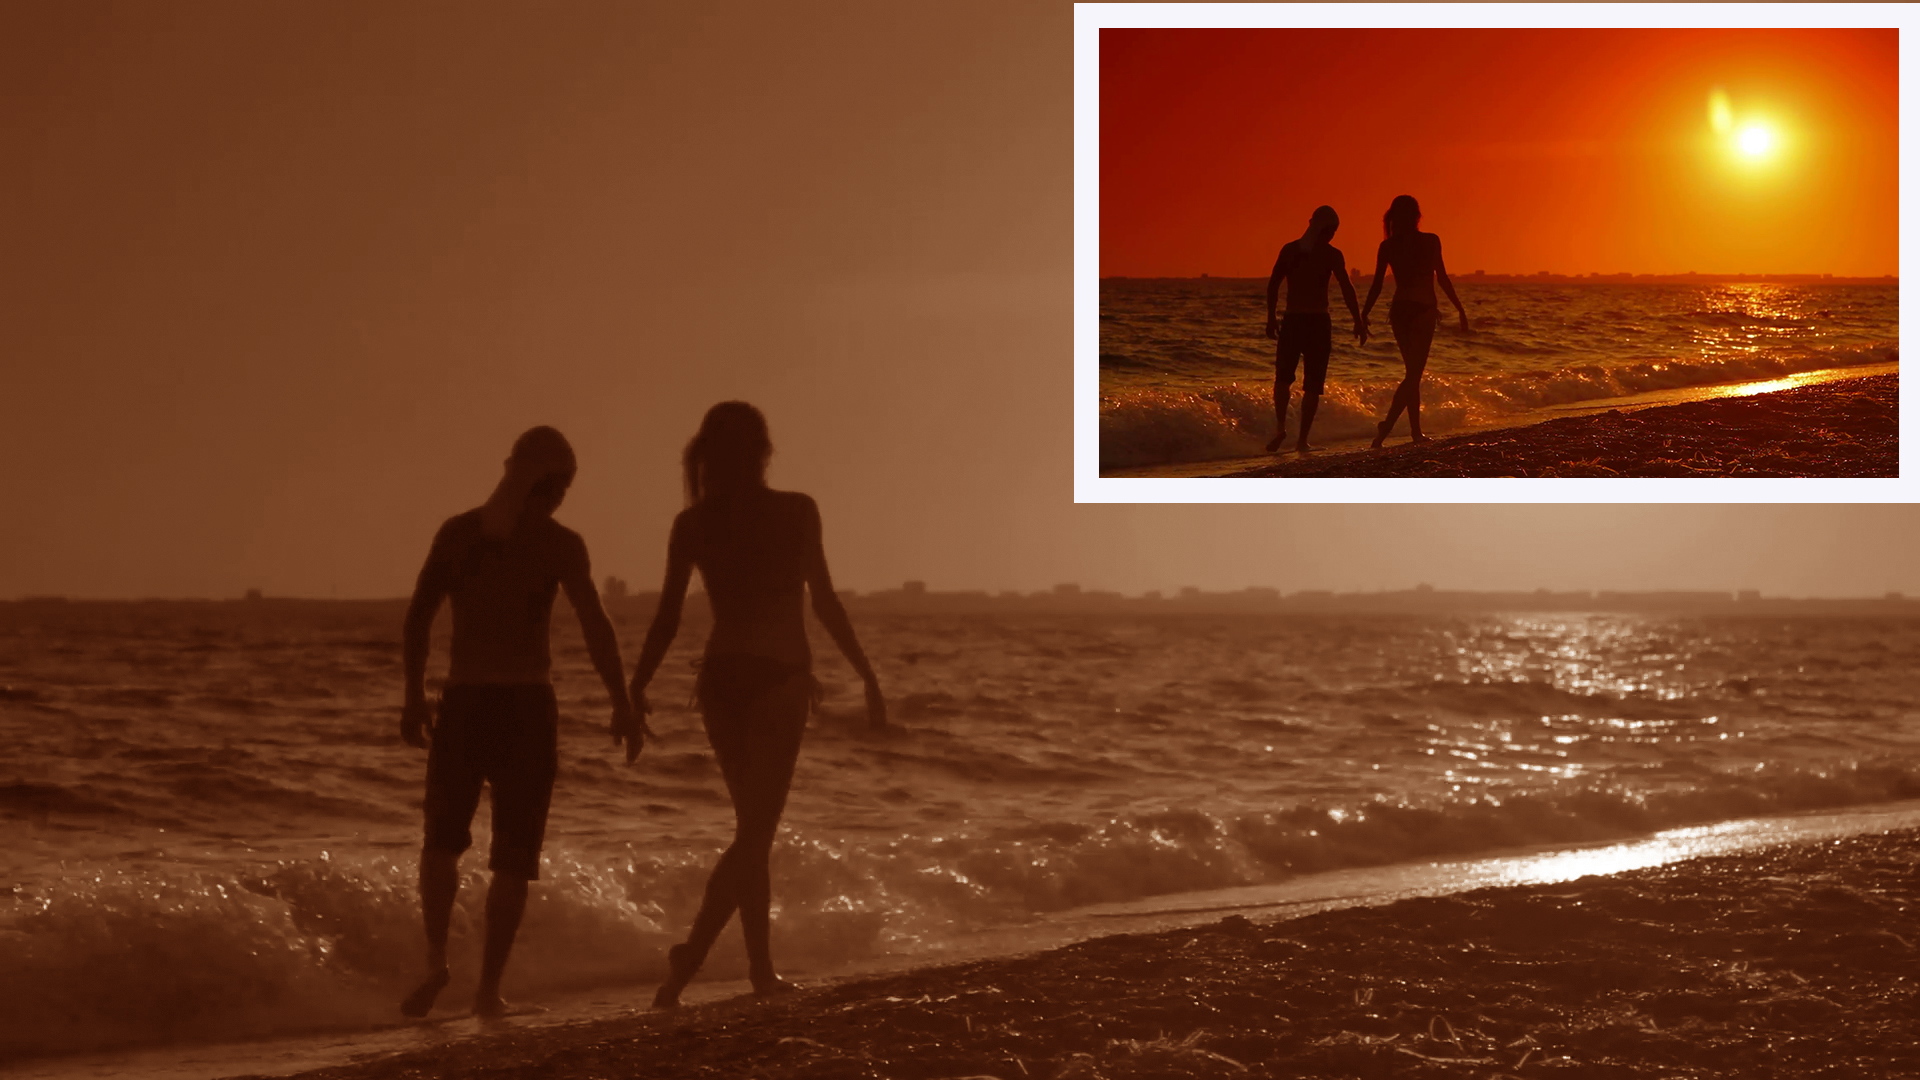
Following the previous task, this one uses the sepia tone as well as a picture frame of the original image.
1/. Find a workable image. Save it twice, first as bg, then bg1, so that one can be reduced.
2/. Reduce the Image Size so that it is proportioned to the larger image and will fit in a corner, Save it as bg1 (and overwrite the bg1 image).
3/. Using the bg (original image), Image Mode - Greyscale, Image Mode RGB (Or you can use Image Adjustments - Desaturate)., then Image Adjustments Colour Balance, Red and Yellow to create the Sepia Effect. Save this as bg, overwriting the original colour image.
4/. Now using bg1, the smaller image, Image Size check. Then create a new image that is 50px wider and higher, with a white background, which will be the photo border.
4.1 Copy the bg1 image to the new file and you will have a bordered image.
5/. Copy this image now onto the bg image and using the Move Tool place the image in one of the top corners. If the bg1 image is too big or covers up a main item on your image, use Edit/Free Transform and reduce this image size.
There it is, your final image within an image.